
Connect your AI tool
Add the Markloop MCP server to Claude, ChatGPT, Codex, Cursor, VS Code, Grok or another MCP client.
Before you start
Markloop connects to your AI tool through MCP, the standard way AI tools connect to other apps. You sign in to Markloop in your browser, so you never paste a password or key into your AI tool.
- Name:
markloop - URL:
https://app.markloop.io/api/mcp - Sign-in: in your browser (OAuth). There is no API key.
Use the URL exactly as written, with no trailing slash.
Once connected, your agent can list your projects and documents, read documents and their comment threads, publish new documents and versions, and add comments and replies. It can't delete anything, and it only reaches the workspaces and projects you approve. For details, see Data & security and the MCP tools reference. For prompts to try, see Example prompts.
Let your agent set it up
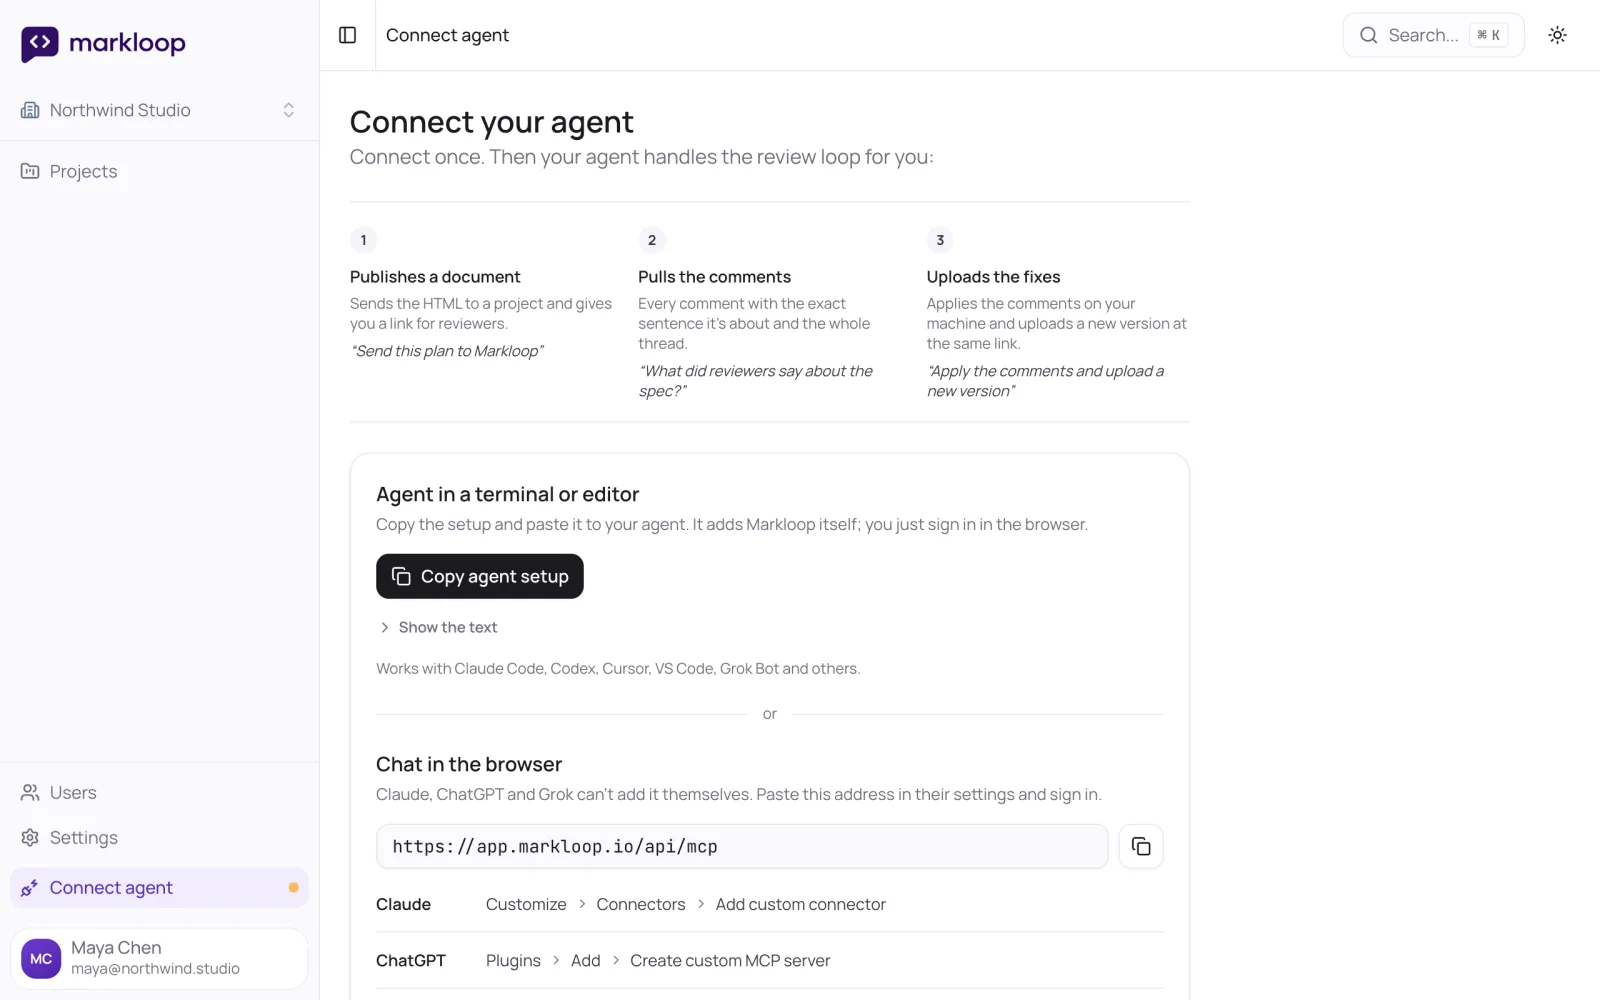
If your AI tool can run commands or edit its own settings, paste this prompt:
Connect Markloop so you can publish my docs and pull back the comments. Setup steps: https://markloop.io/setup.md
The agent reads the setup instructions and adds the server for you. You only sign in in the browser.
Chat apps in the browser can't add MCP servers themselves. For Claude, ChatGPT and Grok, follow the steps under Chat apps.
The Connect agent page in the app (https://app.markloop.io/connect) shows the same options: the setup prompt for agents and the server address for chat apps.
Chat apps
You add Markloop once in the app's settings, then turn it on in a chat. On business and enterprise plans, an admin usually has to allow it first.
Claude (claude.ai, desktop and mobile)
Add the connector on claude.ai or in the desktop app. After that it also works in the Claude mobile app.
- Open Customize > Connectors.
- Click + Add, then Add custom connector.
- Enter the name
Markloopand paste the server URL. Click Continue. - Keep Sign in when needed, or choose Sign in now. Click Add.
- Connect and sign in to Markloop.
To use it in a chat, open + > Connectors and turn Markloop on.
The Claude Free plan allows one custom connector.
Team and Enterprise. Only Owners and Primary Owners can add a custom connector. On Enterprise, custom roles with the "Manage access to Libraries" permission can add one too. They open Organization settings > Connectors, click Add > Custom > Web, and paste the server URL. Members then click Connect next to Markloop and sign in. If you don't have one of these roles, ask an Owner to add Markloop.
Sources: Claude Help Center, Claude connector docs.
ChatGPT
- Open Plugins (chatgpt.com/plugins).
- Click + (Add), then Create custom MCP server.
- Enter a name and paste the server URL.
- Choose OAuth for authentication.
- Accept the warning and click Create, then sign in to Markloop.
To use it in a chat, turn Markloop on from the plugins and tools menu.
Business, Enterprise and Edu. Custom MCP servers are off until a workspace admin allows them. The admin can turn on "Create custom MCP servers" under Workspace settings > Permissions & roles (Enterprise and Edu can allow it per role). The admin can also add Markloop and publish it to the workspace with write actions allowed. Either way, each member signs in to Markloop separately. Some Business workspaces block write tools until the admin allows write actions; see Troubleshooting.
OpenAI renames these settings often. The labels above are current as of October 2026. See OpenAI's guide to connecting MCP servers.
Grok
- Open grok.com/connectors.
- Click New Connector, then Custom.
- Paste the server URL and sign in.
Business and Enterprise. A team admin adds the connector first: in console.x.ai, open the team, then Grok Business > Connectors > + Add Connector > Other, and paste the server URL. This needs permission to manage the team. Members then connect at grok.com/connectors. Source: xAI docs.
Coding agents and editors
These tools add Markloop with one command or one line of configuration. After that, you sign in in the browser.
Claude Code
Run this command:
claude mcp add --scope user --transport http markloop https://app.markloop.io/api/mcpThen restart Claude Code with claude --continue. Type /mcp, select markloop, and choose Authenticate.
If the command says markloop already exists, run claude mcp get markloop and check the URL.
Codex
The Codex CLI and the Codex desktop app share one configuration. Run these commands:
codex mcp add markloop --url https://app.markloop.io/api/mcp
codex mcp login markloop
Cursor
Add this to ~/.cursor/mcp.json:
{"mcpServers":{"markloop":{"url":"https://app.markloop.io/api/mcp"}}}Then open Settings > MCP and sign in with the login or connect action next to markloop.
On Cursor Enterprise, an admin may allow only approved MCP servers. Ask the admin to allow https://app.markloop.io/api/mcp. Source: Cursor docs.
VS Code and Copilot
Run this command:
code --add-mcp '{"name":"markloop","type":"http","url":"https://app.markloop.io/api/mcp"}'Gemini CLI
Run this command:
gemini mcp add --transport http markloop https://app.markloop.io/api/mcpOther clients
Add a remote MCP server (streamable HTTP) with the server URL.
After you connect
Sign in
A browser window opens on Markloop. Sign in, choose which workspaces and projects the agent may use, and click Allow. If you don't have an account, click Sign up in the same window.
Some clients show new tools only after a restart. To check the connection, ask your agent:
Which Markloop workspaces can you reach?
The agent calls markloop_whoami.
More than one workspace
One connection can cover several workspaces, and you grant access to each one when you approve the connection. To change which workspaces and projects your agents can reach, or to disconnect, open the Connect page in the app: app.markloop.io/connect.
If something goes wrong
- "This link has expired": the sign-in page was open too long. Go back to your AI tool and connect again.
- "You have no projects you can connect an agent to": you are only a reviewer in that workspace. Ask a workspace admin for access to a project, or ask the project owner to turn on MCP access for you.
- A call says to re-authorize: you changed what you granted. Re-authorize Markloop in the MCP settings of your client.
- 401 or the connection fails: check that the URL is exactly
https://app.markloop.io/api/mcp.
For more help, see Troubleshooting. To see every tool, see MCP tools.